To edit a faceless YouTube video, work in a fixed order: lock your voiceover first, cut the audio tight, place a visual for every line on a scene map, add captions, then tighten the pacing in a final pass. Editing in that order means you never re-cut footage because the narration changed underneath it.
What does a faceless video editing workflow look like from start to finish?
A faceless editing workflow has six stages, and the order matters more than the software you use. Most guides hand you a list of editors and skip the sequence, which is why beginners end up re-timing B-roll three times.
- Lock the voiceover. Record or generate the narration, fix mispronunciations, and get a final audio file. No visual work until this is done.
- Cut to the narration. Drop the audio on the timeline, remove dead air and flubs, and set the breathing room between sentences.
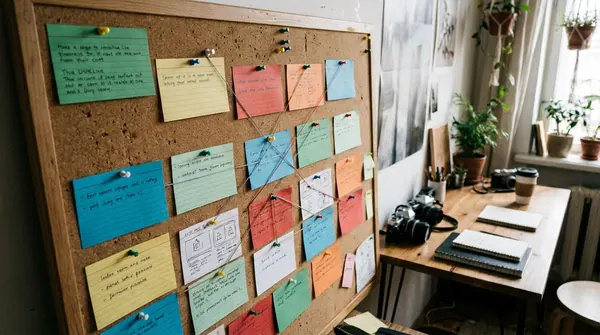
- Build the scene map. Split the script into scenes with timestamps and decide the visual for each one.
- Place B-roll and visuals. Fill the timeline from the scene map, scene by scene.
- Add captions and on-screen text. Use burned-in captions for style, YouTube captions for accessibility and search, or both.
- Tighten pacing and mix audio. Watch the whole thing, cut anything slow, balance music under the voice, then export.
The reason for this order is cost of change. A voiceover edit after you have placed 60 clips means sliding every clip downstream. A visual swap after captions are done costs nothing. So you lock the expensive-to-change layers first and leave the cheap ones for last.
If you are earlier in the pipeline and still need a script, our guide on how to script a YouTube video from idea to voiceover covers the stages before this one, and how to make a YouTube video with AI tools shows the whole chain end to end.
How do you time B-roll and visuals to a voiceover?
You time visuals to a voiceover by building a scene map first: a simple table that lists each scene's start time, the narration line, the visual you will show, and any motion. Then you place clips against the audio waveform instead of guessing.
Here is what a scene map row looks like for a 10-minute video:
| Timestamp | Narration line | Visual | Motion |
|---|---|---|---|
| 0:00 | "Most people retire without a plan." | Empty office chair, desk lamp on | Slow push in |
| 0:06 | "Here's what the data says." | Animated bar chart | Bars rise on the word "data" |
| 0:14 | "It starts at age 25." | Calendar flipping pages | Cut on "25" |
To place clips accurately in your editor:
- Zoom the timeline until you can see the voiceover waveform clearly. Spoken words show up as peaks, and the gaps between sentences are flat.
- Drop a marker at each scene's start time from your map.
- Snap each clip's start to its marker. Where a line contains a key word (a number, a name, a reveal), cut or animate on that word.
- Trim each clip so it ends where the next marker begins, rather than letting it run long and getting cut off.
Two small timing rules save a lot of rework. First, change the visual slightly before the narration finishes the thought, not after. A visual that arrives a beat early feels intentional, one that arrives late feels like the video is lagging behind its own audio. Second, never let a single static image sit through a long sentence without motion. A slow zoom or pan counts, and it is the cheapest way to make a still feel like video.
Where do you get B-roll and visuals without filming yourself?
You get faceless B-roll from four places: stock footage libraries, AI-generated images and clips, screen recordings, and motion graphics you build in your editor. Most channels mix two or three, because relying on one source makes every video look the same.
| Source | Best for | Watch out for |
|---|---|---|
| Stock footage | Real-world scenes, locations, people at work | Generic look, same clips seen on other channels |
| AI-generated images | Abstract ideas, history, stylised scenes, anything stock lacks | Inconsistent style across scenes unless you lock a look |
| Screen recordings | Software tutorials, web pages, tools, walkthroughs | Cluttered desktops and visible personal info |
| Motion graphics and text | Stats, comparisons, lists, definitions | Over-animating until it distracts from the point |
Consistency is what separates a channel that looks designed from one that looks assembled. Pick one visual style per channel (colour grade, image style, font) and apply it to every scene. If you want a deeper source list, we ranked options in the best stock footage and B-roll sources for YouTubeand the techniques in B-roll secrets that make low-budget videos look pro apply directly to faceless work.
One practical rule on volume: for a standard narration video, plan for a new visual roughly every sentence or two rather than one clip per minute. That is not a magic number, just a starting point that keeps each scene short enough that none overstays its welcome. Adjust it to your niche, since a calm documentary can hold a shot longer than a fast listicle.

How do you add captions to a faceless video, and which method is best?
You have two different things called "captions": burned-in captions that you design into the video, and YouTube's own caption track that lives alongside it. The best setup for most faceless channels is both, using your existing script to produce the YouTube track almost for free.
Burned-in captions (styled text in the video)
These are part of the picture, so you control the font, colour, size and placement, and they show up everywhere the video does. They suit fast, punchy formats where the text is part of the look. The downside is they cannot be turned off, translated, or read by YouTube for search.
YouTube's own captions (the CC track)
These are separate from the video file and viewers can toggle them. YouTube describes captions as a way to reach a larger audience, including deaf or hard-of-hearing viewers and viewers who speak another language. You have several ways to add them:
- During upload. You can add subtitles and captions as part of the upload flow, so there is no separate step afterward.
- In Studio. Select Subtitles from the left menu, pick the video, click ADD LANGUAGE, then click ADD under Subtitles.
- Upload a caption file. Choose Upload file, then pick With timing or Without timing. A timed file holds the spoken text plus timestamps for when each line appears, and some files also carry position and style info.
- Auto-sync. Paste or upload a transcript and YouTube sets the timings for you.
- Automatic captions. YouTube generates these with speech recognition and publishes them when available, but only in the video's default language.
Auto-sync is the one most faceless creators should use, because the script already exists. Paste it in and YouTube aligns it to your audio. A few conditions apply: the transcript must be in a language YouTube's speech recognition supports and match the language spoken in the video, and YouTube does not recommend it for videos over an hour or with poor audio. Timing can take a few minutes, and once it finishes the captions publish on the video automatically. That is also one more reason to clean the voiceover first.
If you need to fix individual lines in the manual editor, the keyboard shortcuts speed it up: Windows or Command plus the left or right arrow seeks 1 second back or forward, and Windows or Command plus space plays or pauses. For the difference between the two caption types and when a human review is worth it, see YouTube captions vs subtitles.
How do you pace a faceless video so viewers keep watching?
You pace a faceless video by making the visual or the information change often enough that no stretch feels static, then cutting every line that does not earn its place. Pacing is its own pass, done after everything is assembled, because you can only judge it by watching the whole thing.
Run this pass:
- Watch the full video once at normal speed with no editing. Do not fix anything yet.
- Note the timestamp every time your attention drifts, you reach for your phone, or you think "get on with it."
- At each flagged spot, pick one fix: swap the visual, add motion, shorten the sentence, or delete the line entirely.
- Re-watch only the changed sections.
Where you place your effort matters. The opening is where most viewers decide to leave, so the first 30 seconds deserve the tightest cuts and the strongest visuals in the whole video. Our breakdowns of a hook formula that works in any niche and hooks that hold viewers past 30 seconds go into the script side of that.
After you publish, check whether the pacing worked. Open the video's analytics in YouTube Studio and look at the audience retention graph for sharp drops, which point to the exact moments to fix next time. How to see audience retention on YouTube walks through where to find it. Treat each video as data for the next one rather than guessing what felt slow.
How do you handle sound, music and voiceover cleanup?
Handle audio in three layers: clean the voiceover, set the music well below it, and add sound effects sparingly. Viewers forgive average visuals far more readily than bad audio, so do not skip this step.
For the voiceover itself:
- Remove dead air. Trim long pauses and breaths between sentences so the delivery moves, but leave a short gap after a key point so it lands.
- Fix mispronunciations before editing. Regenerate or re-record the line rather than working around it later. If you use an AI voice, our guides on directing an AI voiceover and going from script to final edit with an AI voice cover the settings that matter.
- Even out volume. Make sure the loudest and quietest lines sit close together so viewers are not adjusting the volume.
For music, keep it under the voice at all times. A common approach is to set the music track clearly lower than the narration and duck it further whenever speech is present, then let it swell slightly in gaps. Pick instrumental tracks without strong melodies, since a catchy tune competes with your words. Always confirm you have the right to use a track: see how to license music for YouTube without copyright strikes and the best royalty-free music libraries. For finer polish, sound design tips for professional YouTube audio is worth a read.
How do you speed up editing when you upload every week?
You speed up weekly editing by turning every repeatable decision into a template and by doing the same task for several videos in one sitting. The goal is for each new video to start mostly assembled, so your real editing time goes to the parts that are actually new.
Build these once and reuse them:
- A project template with your intro, outro, caption style, colour grade, music bed and export settings already in place.
- A scene map template so every script is split into the same columns every time.
- A visual style guide (fonts, colours, image style) so you never re-decide the look. YouTube style guide for creators shows how to lock this down.
- A fixed export preset so the final step is one click.
Then batch by task, not by video. Record or generate three voiceovers in one session, build three scene maps in the next, assemble all three timelines after that. Switching between tasks is what burns time, and batching removes most of the switching. How to batch produce YouTube content like a pro covers how to structure those sessions, and best video editing apps for solo creators helps you choose software that fits a solo workflow.
On the question of how long editing should take: there is no honest universal number, because it depends on video length, how many unique visuals you need and how polished the template is. Track your own time for your first five videos, find the slowest stage, and fix that stage first. For most people it is B-roll sourcing, which a scene map and a consistent visual source shrink the most.
What should you check before you publish a faceless video?
Before you publish, run a short checklist that catches the mistakes viewers notice fastest: audio, captions, on-screen text, pacing and metadata. A five-minute check beats re-uploading.
- Audio. Listen to the first minute and one random middle section with headphones. Voice clear, music under it, no clipping.
- Captions. If you used Auto-sync, scrub a few spots to confirm the timing lines up. Confirm the language setting matches the spoken language.
- On-screen text. Check spelling and that nothing is cut off near the edges, especially for mobile viewers.
- Pacing. Skim the video at normal speed one last time for any stretch that drags.
- Visual consistency. Make sure no scene breaks your colour grade or style.
- Metadata. Title, thumbnail and description are ready. Our YouTube title analysis guide and thumbnail check help here.
Also confirm your channel stays on the right side of YouTube's rules for AI-assisted and templated content. YouTube automation policy: what's allowed in 2026 explains what to watch, and why YouTube rejects channels for reused content is worth reading if your videos lean heavily on stock or repeated assets.
Sources
FAQ
How do you edit a YouTube video without showing your face?
Build the video around a voiceover and replace the on-camera presenter with visuals: stock footage, AI images, screen recordings and motion graphics. Lock the audio first, then place a visual for each line against the waveform.
What is the best free software to edit faceless YouTube videos?
The best free option is the one you will use consistently, since any editor that supports a multi-track timeline, a waveform view and caption or text overlays can do the job. Compare a few in our roundup of video editing apps for solo creators and test with one real video before committing.
How do you sync B-roll to a voiceover?
Zoom into the voiceover waveform, drop a marker at each scene start from your scene map, and snap each clip to its marker. Cut or animate on key words like numbers and names, and bring the new visual in a beat before the narration finishes the thought.
Do faceless YouTube videos need captions?
They are not required, but they help. YouTube notes captions reach a larger audience, including deaf or hard-of-hearing viewers and viewers who speak another language. Since your script already exists, YouTube's Auto-sync can time it to your audio with almost no extra work.

Get more of this in your Google results
Add voclify.io as a preferred source and Google shows you more of our articles in Search and AI Mode.